When starting to advertise on Facebook, one of the first things you need to make sure of is to install the Facebook (Meta) Pixel on your website. The whole process is actually not that complicated when you have the right steps to follow.
So in today’s blog post, we’re going to show you how to install the Facebook pixel on Shopify.
Let’s dive in!
What is the Facebook Pixel?
Before we go through the actual steps, let’s quickly explain what the Facebook (Meta) Pixel is and why you should use it.
The Facebook Pixel is a piece of code that you place on your website. Once installed, it collects data and helps you track the actions people take on your site.
Why is the Facebook Pixel important for your Shopify store?
The more data Facebook has on your customer’s behavior, the better is going to optimize your ads. Therefore, it’s crucial that you add the Facebook Pixel to your website as soon as possible.
Once you install the Facebook Pixel you’ll be able to:
- Measure cross-device conversions
- Create Lookalike audiences
- Create retargeting campaigns
- Run Dynamic Product Ads
Additionally, you will be also able to track many different events such as:
- Pageviews
- Add to cart
- Initiate Checkout
- Purchase
- And more
So, let’s see how you can easily install the Facebook pixel on your Shopify store.
Also, if you prefer to watch how to do it you can check our video on how to install Facebook Pixel.
How to install the Facebook pixel
So, let’s see how you can easily install the Facebook pixel on your Shopify store.
Also, if you prefer to watch how to do it you can check our video on how to install Facebook Pixel.
Create Facebook Pixel
The first step in creating a Facebook Pixel is to go to your Events Manager dashboard.

Click on the green + button Connect Data Sources and select Web.
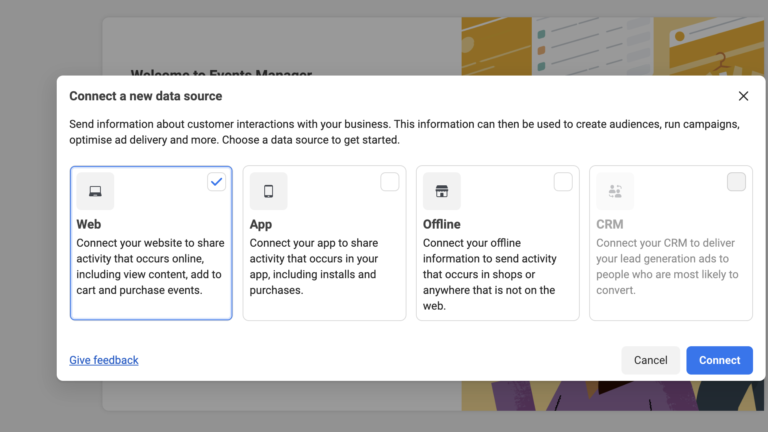
Enter a name for your Pixel and hit Create Pixel.
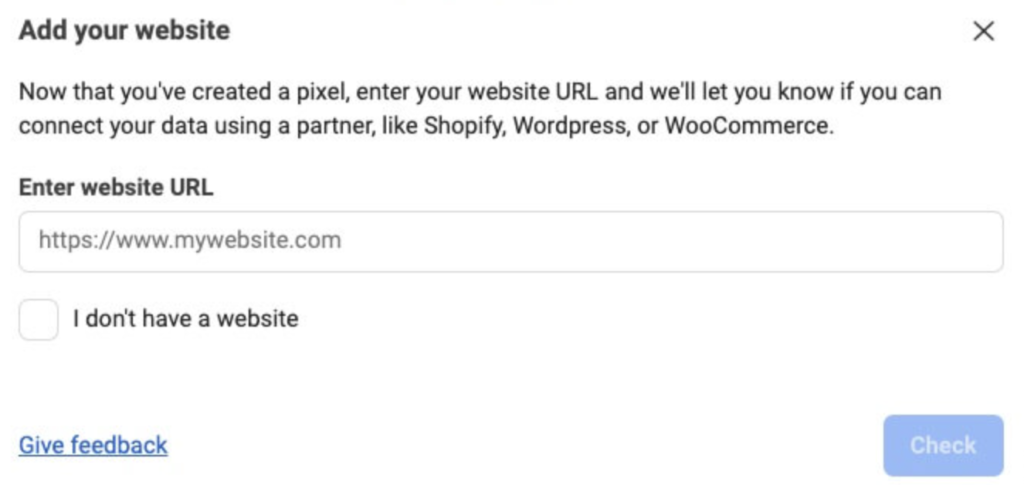
Enter your website URL to check for easy setup options.
And that’s it. You created Facebook pixel. But, this is not the end. The next step is to connect your Pixel to your Shopify store.
Connecting Facebook Pixel with Shopify
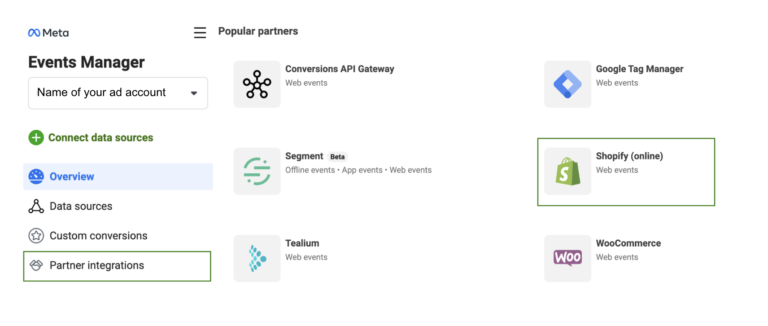
Next, you’ll see that Facebook gives you two ways to install the Pixel on your Shopify store.
Here we recommend going with the Use A Partner Integration option since it’s the easier one.
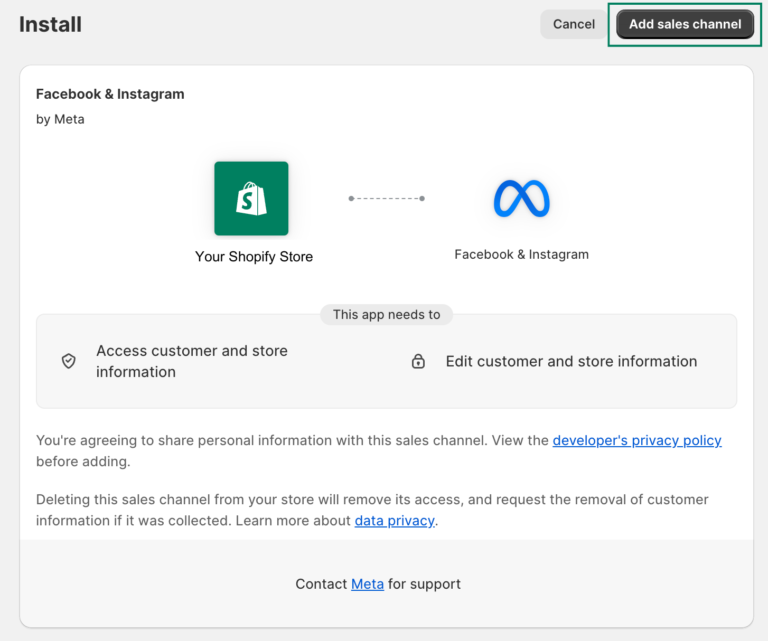
So, the first step is to log in to your Shopify Admin. From there you need to install Facebook & Instagram app.
Authorize the connection by clicking ‘Add sales channel‘ on the next page.
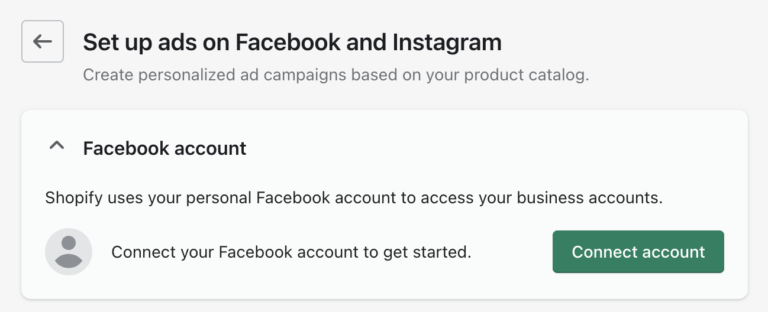
After that, you need to click on Get Started.
Hit Connect account.
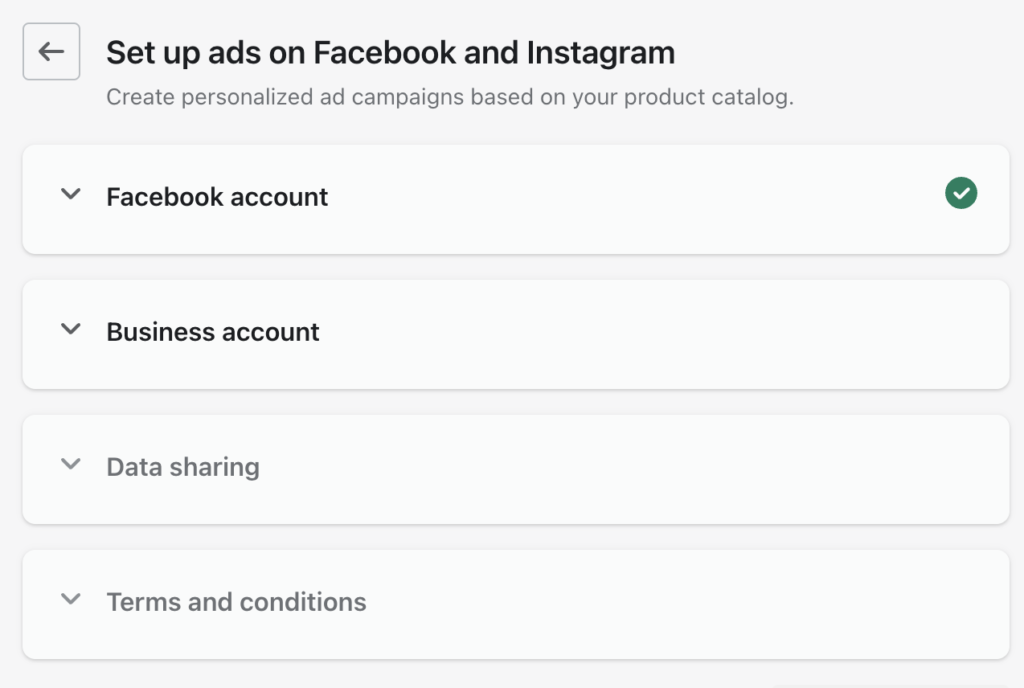
After connecting your Facebook account you’ll need to connect your Business Account.
Hit Connect to connect your business account.
Almost there!
The next step is also important, as you need to set a customer data sharing level so that the pixel collects data correctly.
First, enable customer data sharing.
Then, choose the MAXIMUM option so that your Pixel can collect the highest amount of data.

At the bottom of the page, you’ll then see a list of all the Pixels you have, along with the corresponding ID. Make sure to choose the Pixel you want to use and then click Connect.
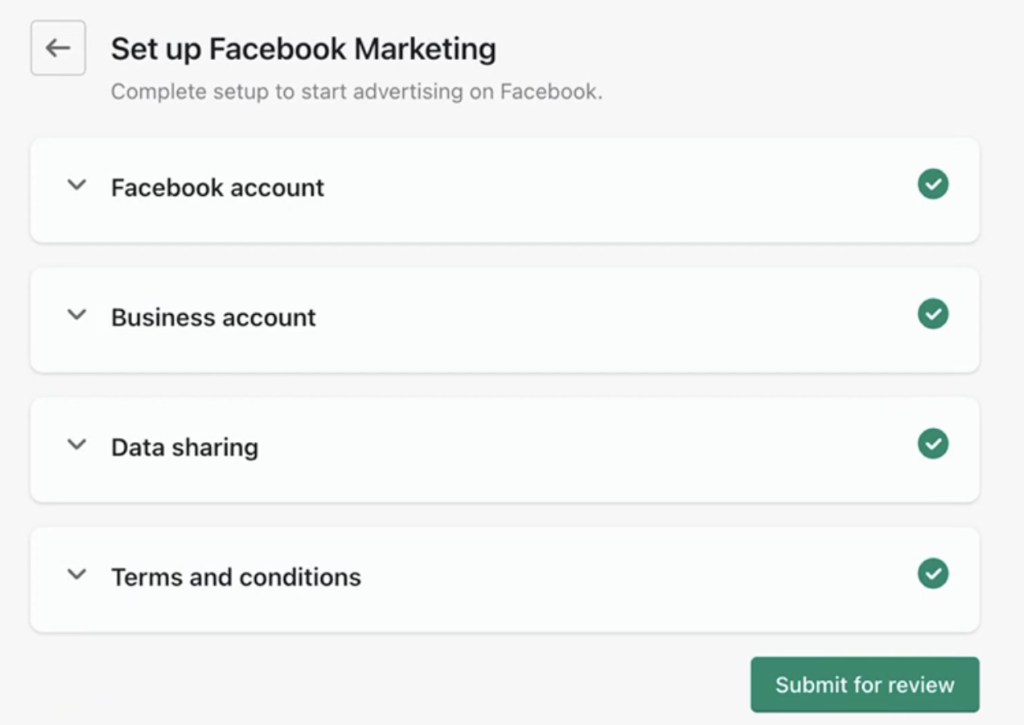
After that, all you need to do is accept the Terms and Conditions. When you do so, click on Submit for review.
And that’s it – now you only need to test if your Pixel is firing and working correctly.
How to check if your Facebook Pixel is working?
What you shouldn't do when installing the Facebook Pixel
Install the Pixel in any way other than using the native Shopify integration
As you probably know, there are many ways you can install the Facebook Pixel on your Shopify store. One of them is through Google Tag Manager.
Even though some people may recommend Google Tag Manager, we’d say it’s much safer to go with the native Shopify integration.
For example, if you put the pixel code in the theme code, you might double up all of your data if you turn on Shopify sharing as well which will cause your data to be over-reported.
Another thing to keep in mind is that Google Tag Manager is available only to stores on the Shopify Plus plan. So if you’re on any other Shopify plan, we wouldn’t recommend using it.
Limit data collection for EU buyers if you’re advertising in the EU
Under the European Union’s GDPR, European customers visiting your Shopify store must give consent before they can be tracked.
When enabled, this feature limits Shopify’s tracking of online store customers and notifies any third-party apps that you have installed in your store to limit their own tracking. So if you’re advertising in the EU, keep this feature deactivated.
Track your Facebook purchases with tools that have its own attribution algorithm
Nowadays there are many tools that can track your Facebook conversions. In our experience, it is best to stick with Facebook’s reporting since every app has its own attribution algorithm that is different from Facebook and therefore, can cause reporting discrepancies.
Summing Up
The Facebook Pixel truly is essential for the success of your Facebook Ad campaigns. So if you still haven’t installed it on your Shopify store, we hope that this guide will help you out.
We’re aware that some of these steps might feel a bit too technical, so if you should have any questions, feel free to reach out to us at [email protected].
For more blog posts on Facebook advertising, make sure to visit our blog and subscribe to our newsletter.