Ready to boost your Facebook ads? Let’s start with the basics – creating a Facebook Custom Audience. If you’re running ads on Facebook, understanding and utilizing custom audiences is a game-changer. A Facebook Custom Audience allows you to precisely target your ads, reaching the right people with the right message. In this blog post, we’ll guide you through the process of creating custom audiences step by step, ensuring your Facebook ad campaigns hit the mark.
Why Use Facebook Custom Audience
Why should you consider setting up a Facebook Custom Audience? It’s a strategic move to make the most of your advertising budget. If you’re running an e-commerce store – you want to make every advertising dollar count.
One compelling reason is to exclude customers who’ve already made a purchase, especially within the last six months. Facebook ads can be expensive, but they’re effective at reaching potential customers. By excluding recent buyers, you ensure that your marketing efforts are focused on attracting new customers, not retargeting those who’ve already converted.
But there’s more to it than exclusion. You also want to make sure you’re not wasting your resources on existing customers. There are cost-effective methods to engage them for repeat purchases like email marketing, loyalty programs, and social media engagement.
How to Create Facebook Custom Audience
Now, let’s see how you can create a Facebook Custom Audience step-by-step. However, If you’re more of a visual learner, check out our video about this topic.
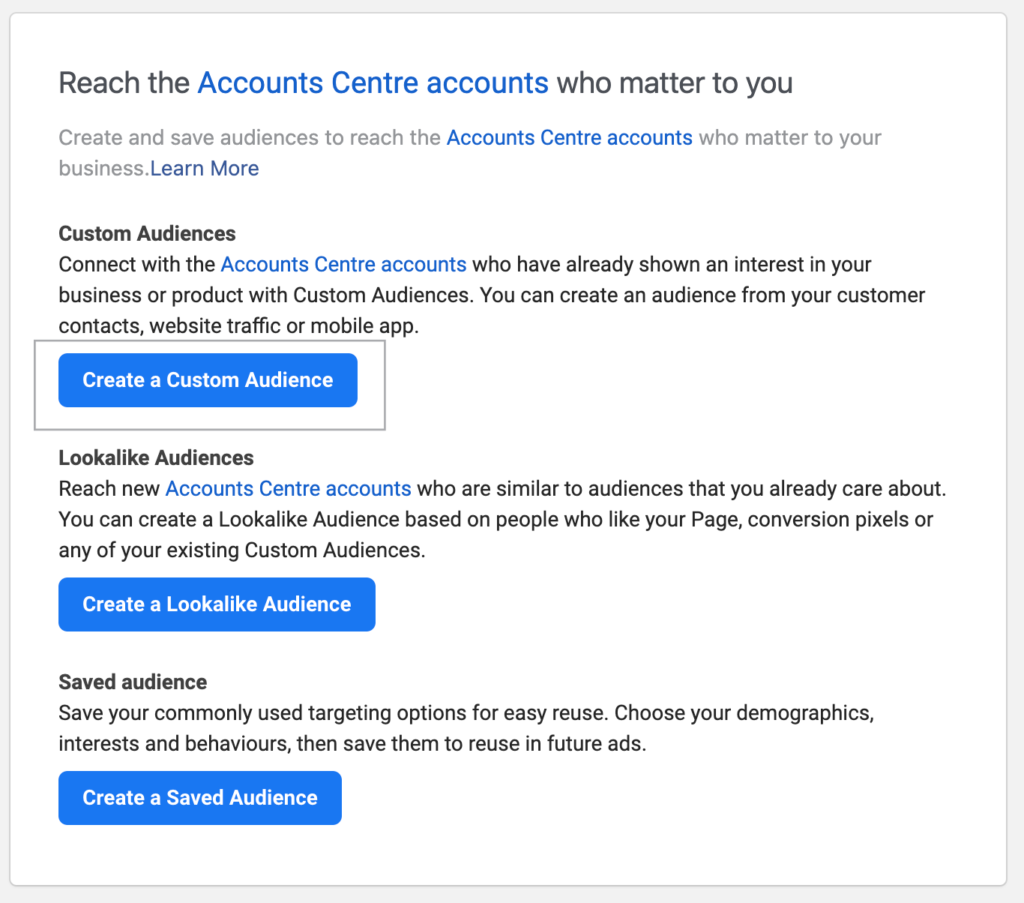
First, head over to your Facebook Audience Manager. Once you’re there, you’ll find the option to create a Custom Audience. Keep in mind that having the Facebook Pixel installed on your Shopify Store is essential for this.
When you click to create a Custom Audience, you’ll be presented with a variety of sources to choose from. For this guide, we’ll focus on crafting a Custom Audience from your website visitors.
Website Visitors Audience
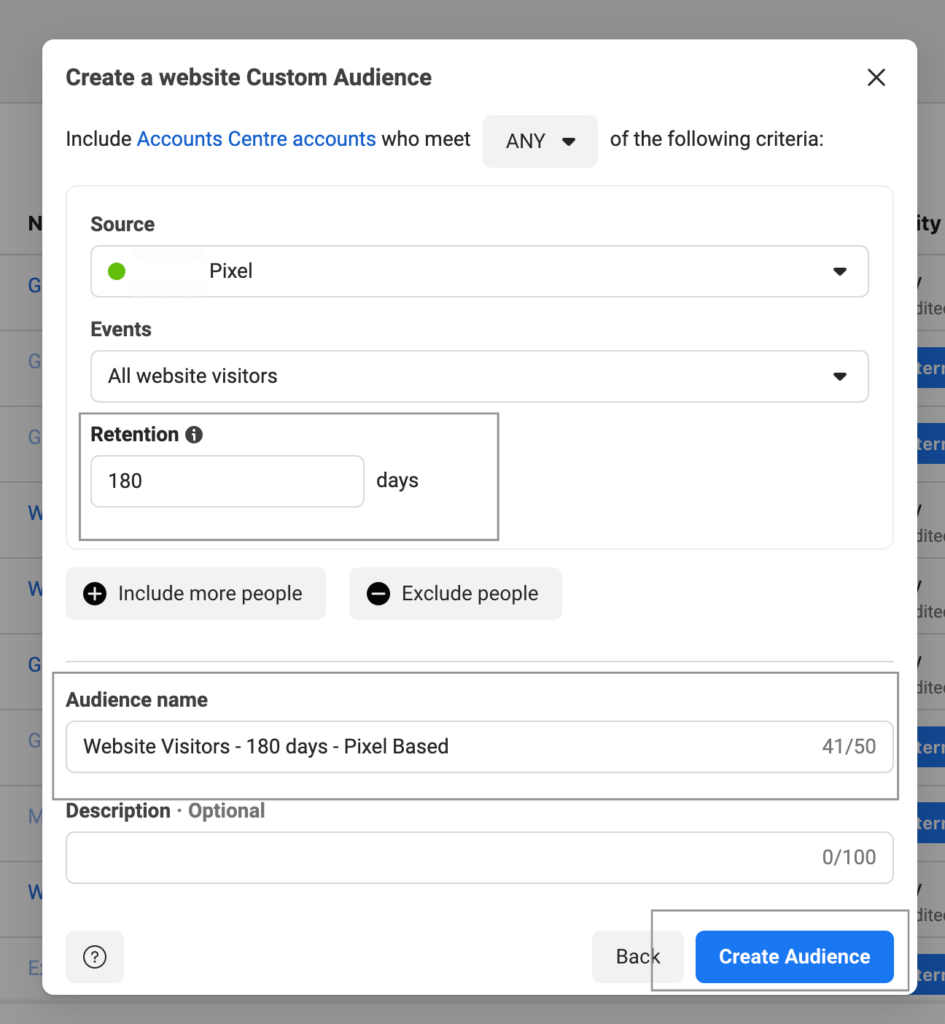
Step 1. When you select ‘Website visitors’ as your source, click ‘Next.’ At this point, your Pixel will be automatically selected as the source.

Step 2. For events, choose ‘all website visitors.’ To target the past six months of website activity that your Pixel has tracked, set the retention period to 180 days.
Finally, name your audience; for example, you can name it ‘Website visitors – 180 days.’ While you have the option to add an audience description, we prefer to keep the name highly descriptive, ensuring it conveys all the essential details at a glance.
Purchasers Audience
Creating a custom audience targeting your past purchasers follows a similar process. Begin by navigating to ‘Create Audience’ and select ‘website visitors.’
However, the key difference here is in the ‘event’ you choose, which should be ‘Purchases.’ The goal in this case is to exclude all your previous buyers from your Facebook ads.
As previously mentioned, advertising to your existing customers on Facebook might not be the most efficient use of your ad budget.
This approach allows you to precisely exclude your loyal customers from both your retargeting and prospecting campaigns.
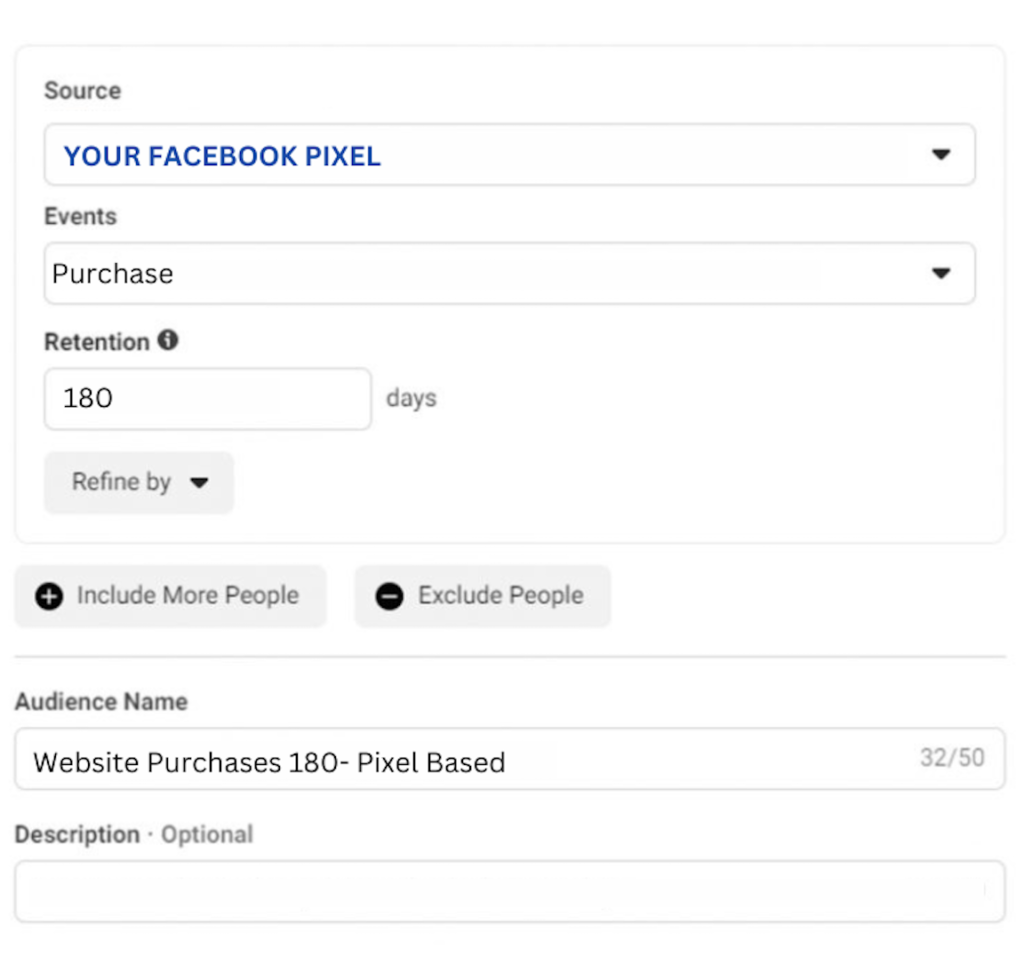
For the retention period, the standard choice of 180 days still applies, capturing the last six months of purchase activity tracked by your Pixel.
When it comes to naming your audience, consider a label like ‘Website Purchasers 180 – Pixel Based’ – this descriptive name helps you easily identify the group you’re excluding from your ad targeting efforts.
Summing Up
And there you have it – the process of creating a Facebook Custom Audience. Keep in mind that it may take some time for Facebook to populate this audience with the right data.
However, once you’ve successfully created it and it’s listed in your Facebook Custom Audience section, you’ll have a powerful tool at your disposal for more targeted and efficient advertising. This audience will help you reach the right people with your ads, excluding those who don’t need to see them.