Are you thinking about starting to advertise on Facebook? Are you feeling a bit lost when it comes to Facebook ad targeting options? Don’t worry, we got you! Stick with us because we’re going to break down all the targeting options on Facebook while explaining how to use them properly.
After reading our guide, you should be able to master the targeting and get those ads going in no time.
Facebook Ad Targeting
First, what is Facebook ad targeting? Well, Facebook ad targeting is selecting the perfect audience for your ads.
It’s all about picking the audience who are most likely to purchase your products. You can choose specific things like their age, what they’re interested in, and even where they live. This helps make sure your ads reach the audience who are most likely to be interested in buying from your online store.
Let’s dive deep into all Facebook ad targeting options you can choose from.
Facebook Audience Options
Facebook gives you a ton of options, but the question is which audience your business speaks to the most. Your journey begins with Facebook’s Ads Manager – a simple all-in-one tool for creating and managing your ads. To start exploring and creating your audience, click on your business tools in the left corner, and select Audiences.
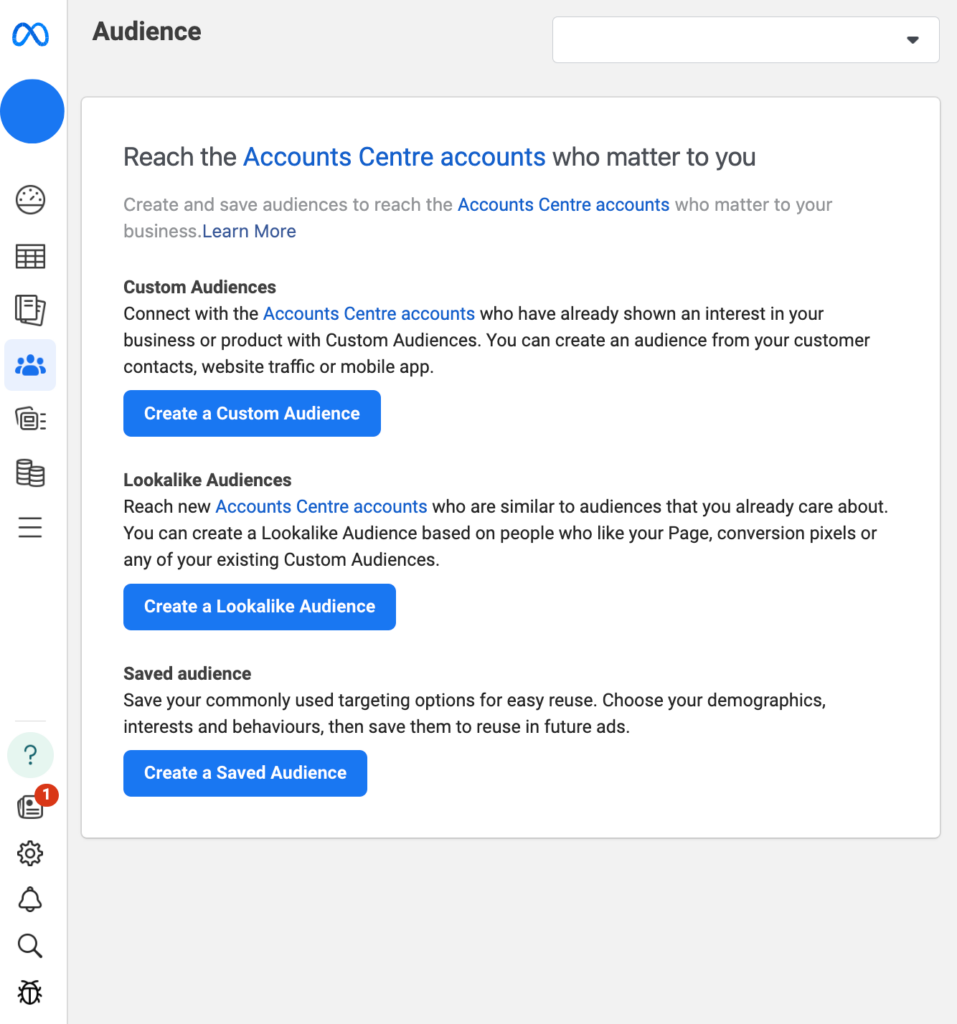
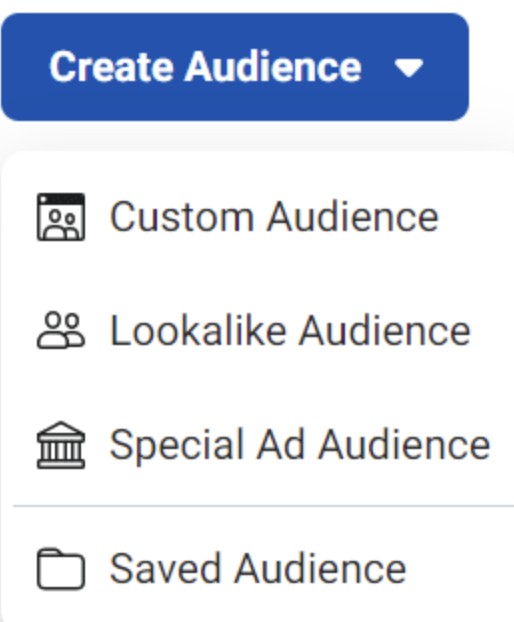
You will find 3 audience types here – A Custom Audience, a Lookalike Audience, and a Saved Audience.
Each one of these audiences has its unique purpose, so let’s break down their differences.
Facebook Saved Audiences
First, let’s start with Saved Audiences.
With Saved Audiences, you can target people based on their demographics, interests, and locations. You can create Saved Audiences both in the ad set setup phase or in the Audience Manager. To create a saved audience in the Audience Manager, simply click Create Audience – Saved Audience.
Creating a Saved Audience from your Audience Manager is going to save you time when creating new ad sets. So if you already know the demographics, interests, and locations of your target audience, you might just want to create your Saved Audiences straight from the Audience Manager.
This way, when creating new ad sets, you’re just going to select the saved audience you’d like, and voila – you’re ready to move on to the next step!
Now let’s quickly run through the 3 parameters that you can use to create your audiences.
Location
For locations, you can reach people based on their country, region, postal code, city, etc.
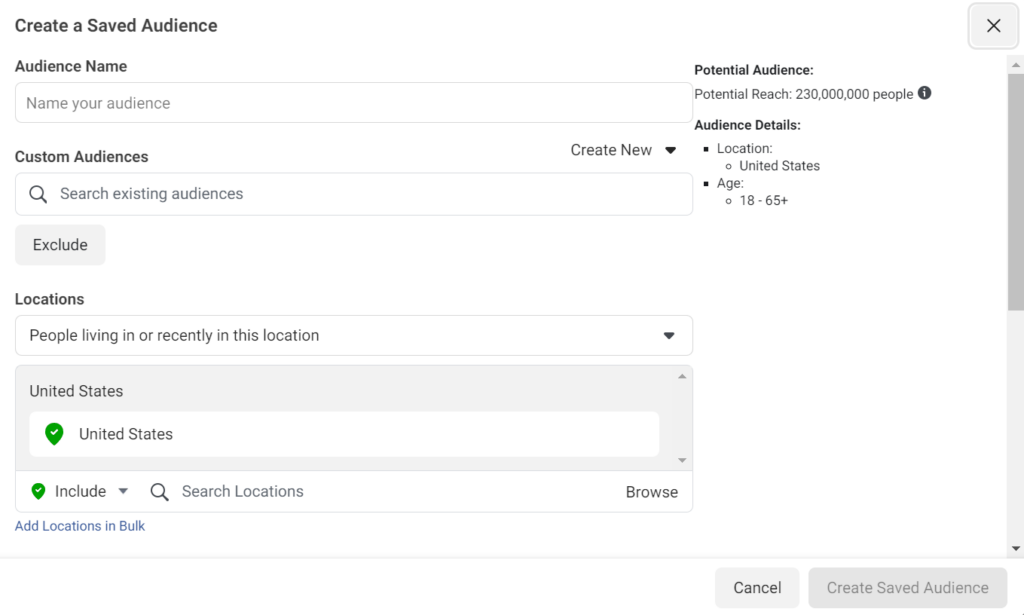
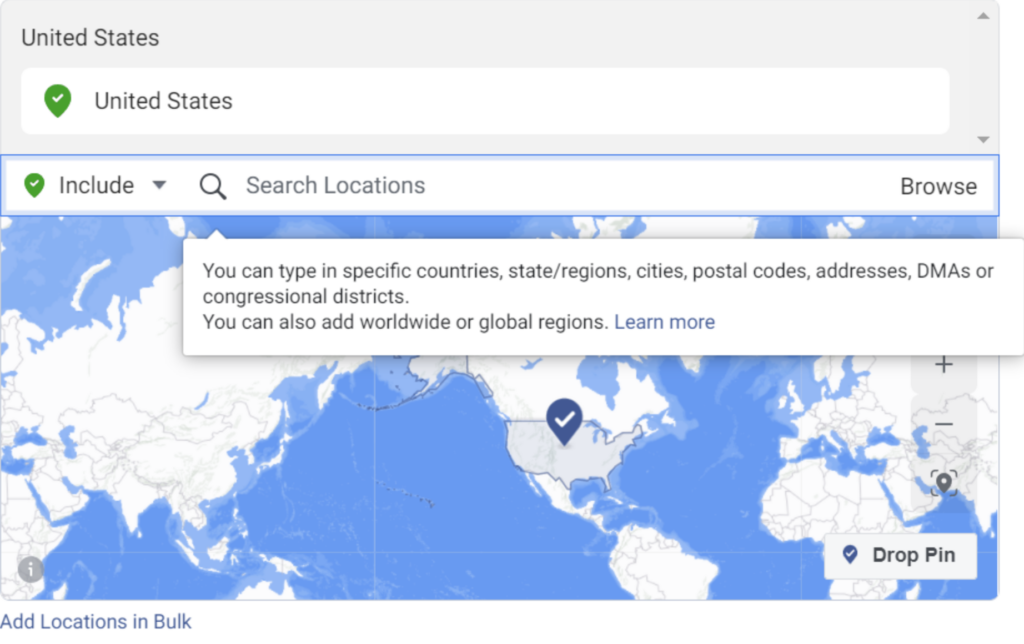
You also have the option to go a little bit further and be even more specific with location targeting. So based on that, you can choose between these 4 options:
- People living in or recently in this location – people whose home or most recent location is within the selected area
- People living in this location – people whose home is within the selected area
- People recently in this location – people whose most recent location is within the selected area
- People traveling in this location – people whose most recent location is within the selected area but whose home is more than 125mi/200 km away
Age, gender and language
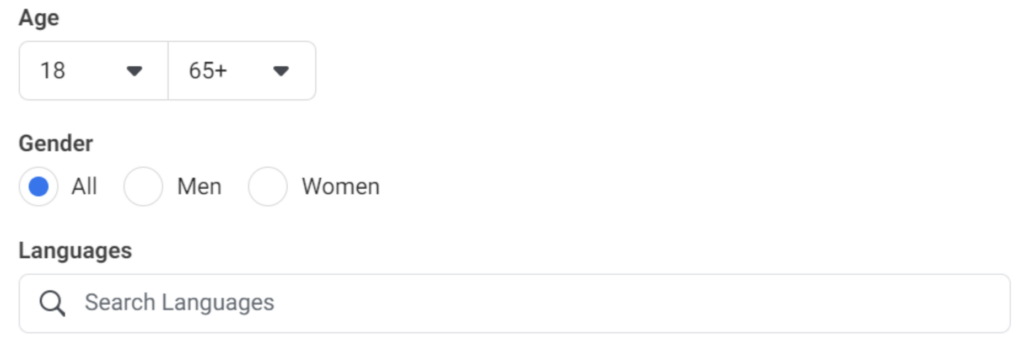
Choosing the right age, gender and language depends on the product or service you offer. For example, if your product is designed and made for women of a younger age, there’s no point in targeting men. Therefore, you should target a female audience and select an age range that matches your desired niche.
Language is pretty much straightforward. Just remember to target people who can and will understand your ads if you’re advertising in a particular language.
Detailed targeting
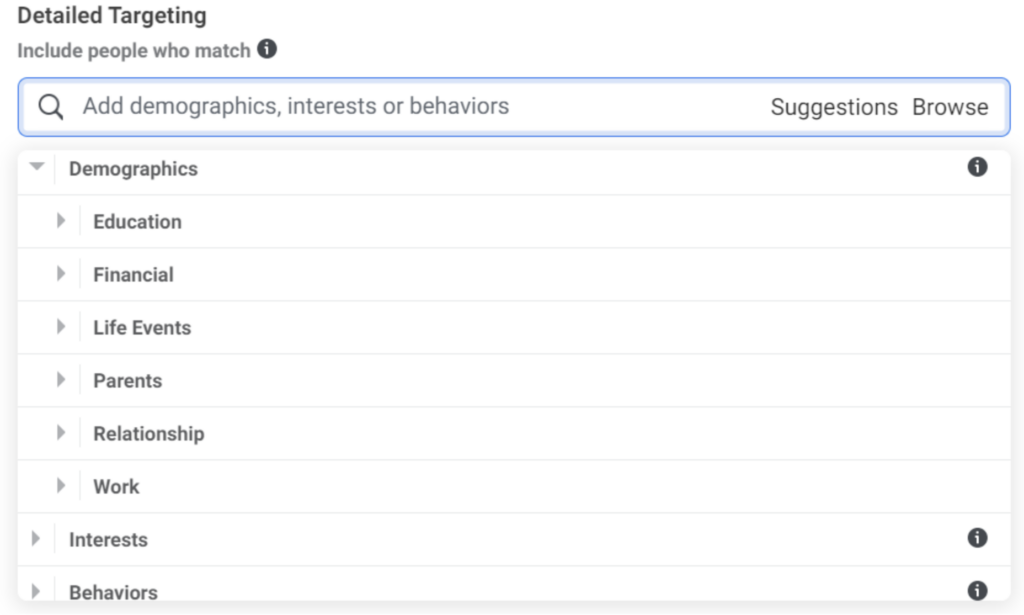
Detailed targeting is another audience option in Saved Audience, that allows you to be even more specific with your audience. You can target people based on demographics, interests, and behaviors.
1. Demographics
For example, you can reach people based on their education, employment, household, and other lifestyle details.
2. Interests
For interests, you can target people based on their assumed interests. This could be anything from your competitors, similar products, to sports, hobbies, etc. If you’re not sure which interests you should choose, simply add suggestions from Facebook.
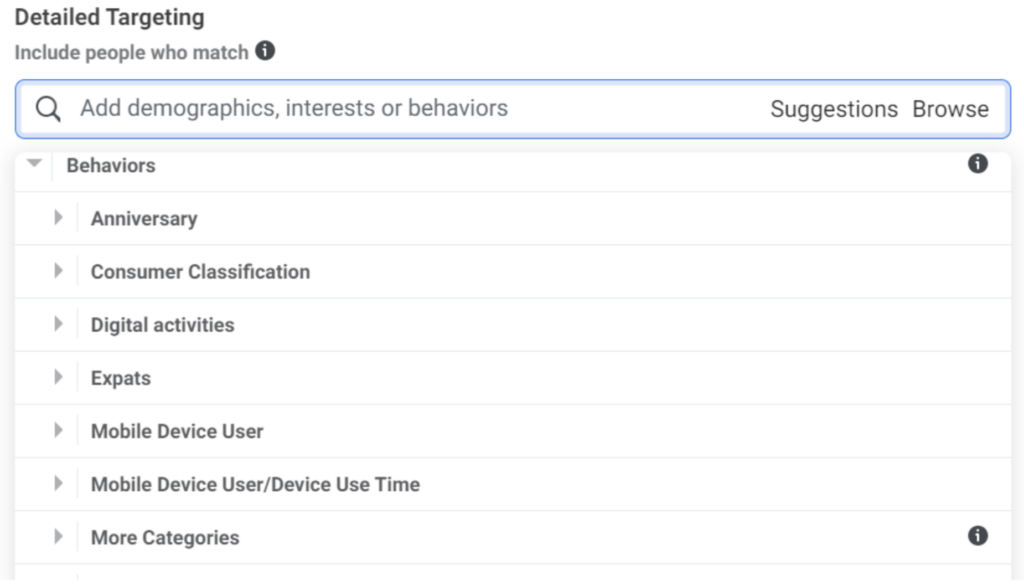
3. Behaviors
Under this category, you can target people based on their online behavior and the devices they use.
Facebook Custom Audiences
Custom Audiences are one of the most powerful audiences on Facebook. What’s so great about them? You’re creating an audience out of people who are already familiar with your product or business in general. This means your ads are being shown to people who already know something about your business, so the chance of converting them is high.
That’s the main reason why custom audiences usually perform significantly better than cold audiences. A Custom Audience can be made of people who visited your website or specific web pages, people who added items to the cart, initiated checkout, signed up for your newsletter, and much more.
Create A Custom Audience
When creating your custom audience in Ads Manager, there are plenty of options to choose from. Keep in mind there’s a big difference between Facebook’s and your sources. We recommend sticking to your sources as this includes people who already interacted in some way with your business and thus the results are going to be better.
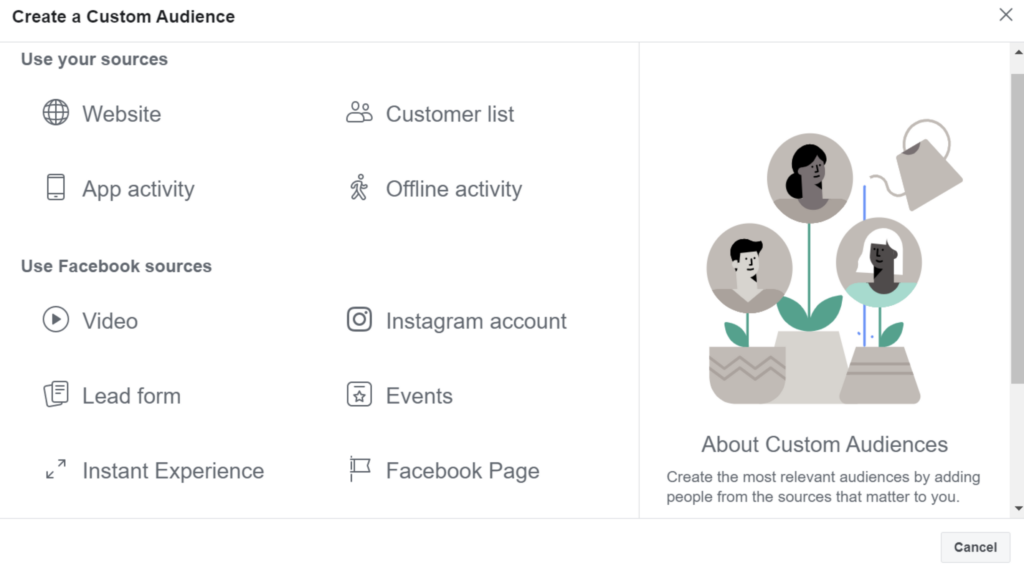
So let’s quickly go through one of the options. We’re going to choose “Website” as it’s the one that you’re probably going to use the most.
You have multiple options, such as:
- Target all website visitors
- Target people who visited specific web pages
- Target people who visited specific web pages but not others
When creating a custom audience, there might be a chance your audience is going to be too small and thus your ads may not deliver.
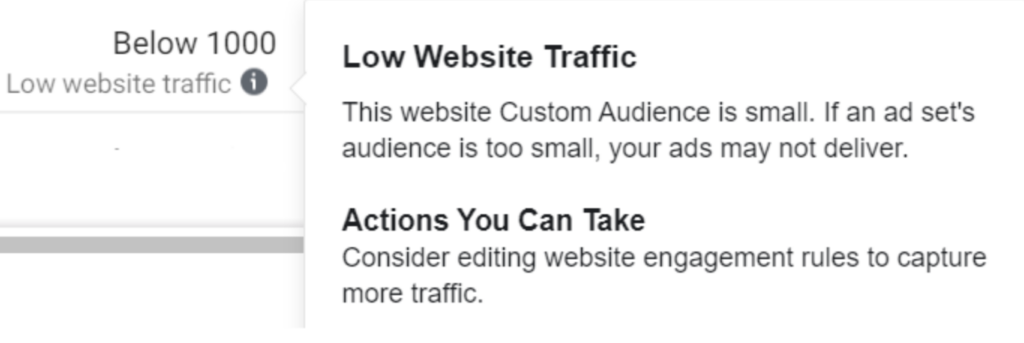
So if you’re just getting started and you don’t generate much website traffic, we’d recommend targeting all website visitors in the past 180 days. That way you’re going to have a much broader audience. Your time range can go all the way from 7 days up to 180 days, and advertisers mostly go for the last 30 or 60 days.
One thing to keep in mind for when you’re going to re-target your website visitors is to have the Facebook pixel installed on your website. If you’re reading this and thinking “What on earth is a Facebook pixel?”, read more about Pixel here.
On the other hand, if your website is generating a lot of traffic, you can get creative. For example, you can target people based on the actions they made on your website. All from initiating checkout, adding items to the cart, submitting a form, or purchasing something.
After choosing your option, simply type in the name of your audience and you’re all done!
Facebook Lookalike Audiences
For most advertisers, Facebook’s lookalike audiences give the best results. But what is a lookalike audience? Think of it as a group of people that’s similar to another group of people with which you’re familiar.
Let’s say you have a list of people who purchased from your website in the last 30 days. You could easily upload this list to Facebook and in just a few clicks create a lookalike audience from it. Facebook will then look at these people and try to find the most similar ones that are most likely to convert.
This is a great way to boost conversions because you’re advertising to people who are similar to your current customers.
But let’s see how to create a lookalike audience. We are still in the audience section of the Ads Manager and you’re simply going to click the blue Create Audience button.
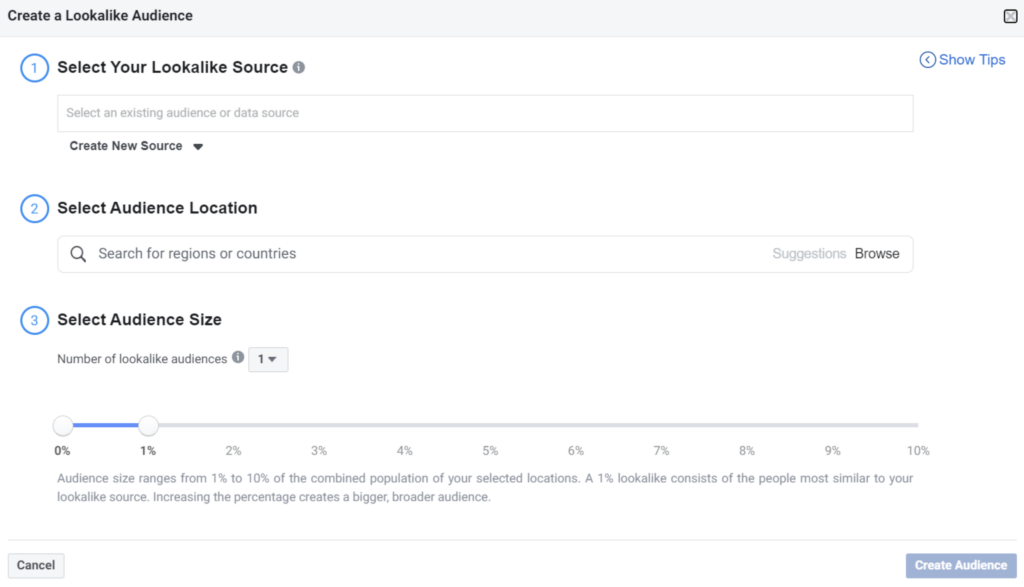
Step 1: Select Your Lookalike Source
In this step, your source is going to be one of the custom audiences that you’ve previously created. The source can be a custom audience that was created with your pixel, but it could also feature people who liked your page or your mobile app users.
Step 2: Select Audience Size
Next, you’re going to select the desired audience size which is expressed in percentages (1%-10%). The smaller the percentage, the more similar the lookalike audience is going to be to your source. Increasing the percentage will create a bigger, broader audience, but a less similar one.
Note: You no longer need to include locations to create lookalike audiences. Lookalikes now use the locations from your ad sets.
Summing Up: Facebook Ad Targeting
Congratulations – you’ve made it to the end of our guide and hopefully mastered Facebook ad targeting. In case you’d like to learn more about advertising on Facebook check out our blog or subscribe to our newsletter.


