Today, let’s talk about how to manually implement Facebook purchase event on Shopify. Installing the Facebook Pixel on your Shopify store manually involves several steps. This process can be useful if you want more control over the placement and usage of the Facebook Pixel, compared to automated integrations available through Shopify or Facebook.
Alternatively, if you want to install more than one Facebook pixel and use automated integration for the first one, manual installation will be the best possible option for your second pixel.
Phase 1: Implement Page View Event On All Web Pages
First, let’s start with implementing a page view event on all your web pages.
For easier following we’ll break it down in a few steps. First, let’s create Facebook pixel.
Step 1: Create Facebook pixel
- Go to your Facebook Events Manager.
- Click on the ‘Pixels’ option under Data Sources.
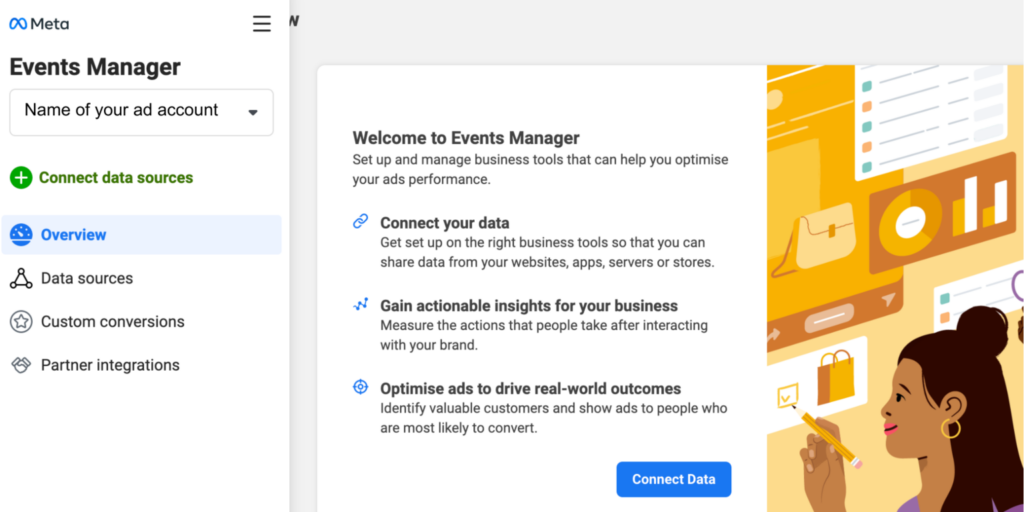
- After that, click the ‘Add’ button to create a new pixel.
- Enter a name for your pixel and your website URL.
- Click ‘Continue’ to create the pixel.
Step 2: Get the pixel code
- After creating your pixel, you’ll be prompted to set up the pixel. Choose ‘Manually Install the Code Yourself’.
- You will be shown the pixel base code. Copy this entire code. This is what you’ll need to install on your Shopify store.
It looks like this:
And the exact code looks like this (just replace “xxxxxxxxxxxxxxx” with your code; just note you have to replace it twice):
					<!– Meta Pixel Code –>

<script>

!function(f,b,e,v,n,t,s)

{if(f.fbq)return;n=f.fbq=function(){n.callMethod?

n.callMethod.apply(n,arguments):n.queue.push(arguments)};

if(!f._fbq)f._fbq=n;n.push=n;n.loaded=!0;n.version=’2.0′;

n.queue=[];t=b.createElement(e);t.async=!0;

t.src=v;s=b.getElementsByTagName(e)[0];

s.parentNode.insertBefore(t,s)}(window, document,’script’,

‘https://connect.facebook.net/en_US/fbevents.js’);

fbq(‘init’, ‘xxxxxxxxxxxxxxx‘);

fbq(‘track’, ‘PageView’);

</script>

<noscript><img height=”1″ width=”1″ style=”display:none”

src=”https://www.facebook.com/tr?id=xxxxxxxxxxxxxxx&ev=PageView&noscript=1″

/></noscript>

<!– End Meta Pixel Code –>
Step 3: Install pixel code on Shopify
Now, it’s time to install Facebook pixel code on your Shopify store. Let’s cover it step by step.
- Log in to your Shopify admin dashboard.
- Go to ‘Online Store’ > ‘Themes’.
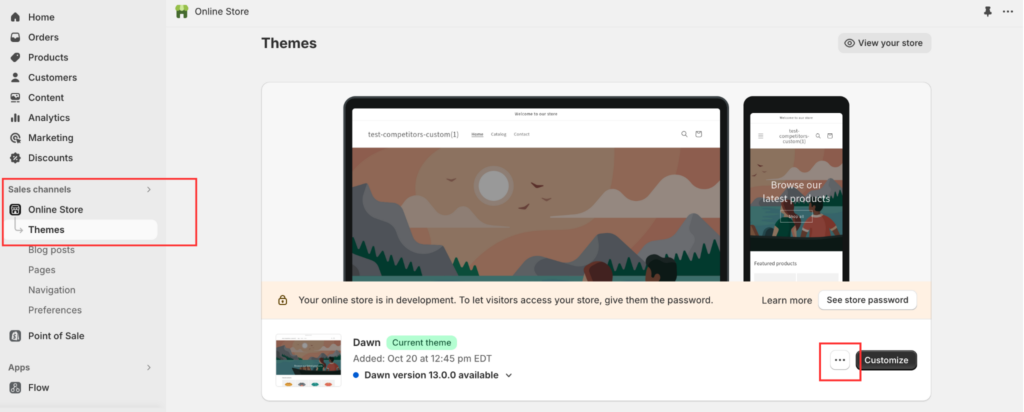
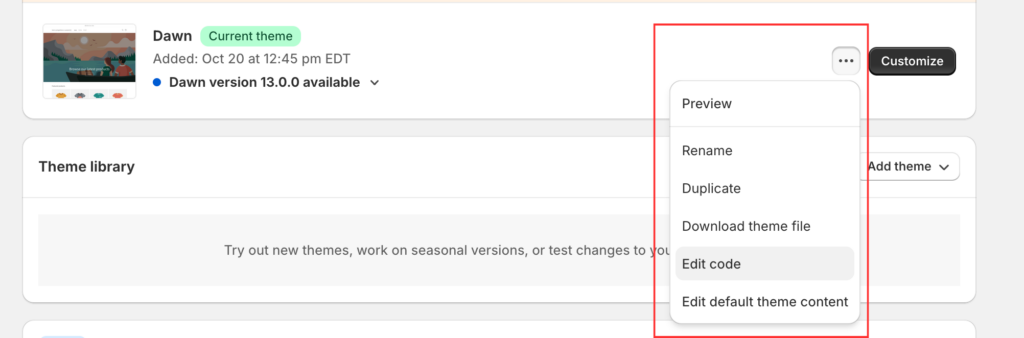
- Find the theme you want to edit, click ‘Actions’, and then select ‘Edit code’.
- Under the ‘Layout’ folder, find the theme.liquid file and click on it.
- Paste your Facebook Pixel code just above the closing </head> tag in the theme.liquid file. This ensures the pixel loads on every page of your website.
- Click ‘Save’ to apply the changes.
Here is how it should look in theme.liquid file:
Step 4: Test your pixel
The last step here is to check if your pixel works. To check if everything is alright with your pixel use Meta Pixel Helper.
- Use the Meta Pixel Helper Chrome extension to test if your pixel is working correctly.
- Navigate to your website, and the Pixel Helper should indicate whether the pixel is firing properly.
Additionally, check for duplicate pixels. Ensure you don’t have duplicate pixels installed if you’ve used any app integrations previously.
Also, keep your pixel updated. Meta occasionally updates how the pixel works, so keep an eye on any changes that might require you to update your pixel code.
Phase 2: Implement Purchase Event On All The Checkout Page
Now that we implemented the view event on your Shopify store it’s time to implement the purchase event.
You’ll need to implement a purchase event on all your checkout pages. So, let’s see how you can do that.
Step 1: Obtain the purchase event code
					<script>
    fbq('track', 'Purchase', {currency: "USD", value: 30.00});
  </script>
Step 2: Add the purchase event code to your Shopify store
The next step is to add the purchase event code to your Shopify store.
- Log in to your Shopify admin dashboard.
- Go to ‘Settings’ > ‘Checkout’.
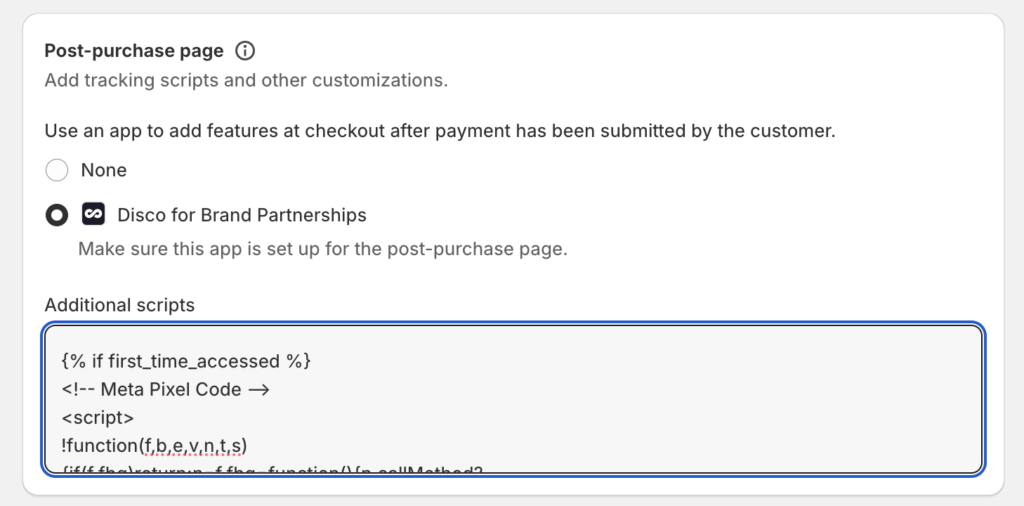
- Scroll down to the “Order processing” section (Now called Post-purchase page).
- Under “Additional scripts”, paste your purchase event code.
Step 3: Customize the purchase event code
To dynamically change the value in the “value” section of your Facebook Pixel purchase event code based on the order value in Shopify, you’ll need to use Shopify’s Liquid template language.
Liquid allows you to access and display data from your Shopify store dynamically.
For the purchase event, specifically, you want to capture the total amount a customer spends on their order. This includes the cost of the products purchased but can also factor in discounts, shipping, and taxes based on how you want to report revenue.
The most straightforward approach to getting the total value of an order is to use the {{ order.total_price }} Liquid object. This object represents the total price of the order, which includes discounts, shipping, taxes, and any adjustments made to the order’s pricing.
However, when using this value in the Facebook Pixel code, it’s crucial to format it correctly to ensure it’s recognized as a numerical value without any currency symbols or formatting. The money_without_currency filter can be applied to achieve this.
Here is an example of the modified code:
					fbq('track', 'Purchase', {
    value: {{ order.total_price | money_without_currency }}, currency: '{{ shop.currency }}',
});
Explanation of purchase events code
- {{ order.total_price | money_without_currency }}: This Liquid code dynamically inserts the total order value as a numerical value without any currency symbol. It ensures that the “value” parameter in the Pixel event gets a clean, numerical input that Facebook can use for reporting and analytics.
- {{ shop.currency }}: This Liquid code inserts the currency of your Shopify store, ensuring that the Purchase event tracks the correct currency for each transaction.
In addition, make sure to wrap your code in an if-statement to make sure it loads only when users open/thank-you page for the first time.
This conditional Liquid tag ensures that the Purchase event is only triggered the first time the thank you page is accessed, which is typically right after a purchase is completed.
This helps prevent duplicate reporting of the same purchase if the customer refreshes the thank you page or accesses it again later.
Here’s how you would implement it:
					{% if first_time_accessed %}

  fbq('track', 'Purchase', { value: {{ order.total_price | money_without_currency }}, currency: '{{ shop.currency }}',  });

{% endif %}
Why Use {% if first_time_accessed %}?
There are two reasons why you should use {% if first_time_accessed %}.
The first one is to prevent duplicates. It avoids the potential duplication of conversion events in your Facebook Ads Manager, which can occur if the customer refreshes the thank you page or revisits it. Duplicate events can skew your data, making it harder to accurately measure the ROI of your ad campaigns.
The second one is accurate tracking. The code ensures more accurate tracking and reporting of conversion events, helping you to understand the true effectiveness of your advertising efforts.
Step 4: Test your purchase event
After you’ve added and customized your Purchase event code, it’s important to test and make sure it’s firing correctly:
- Complete a test purchase on your Shopify store.
- Use the Meta Pixel Helper Chrome extension to verify that the Purchase event fires on the “Thank You” page.
- Check your Facebook Events Manager to see if the event is being received.
And that’s it. This is the way to implement Facebook purchase event on Shopify store manually.
However, here are some tips that you need to keep in mind:
- Ensure that your Purchase event code does not duplicate any existing event tracking that may have been set up through Shopify’s integrated Facebook marketing tools or any other third-party apps.
- The value of the order should reflect the actual amount paid by the customer, excluding shipping and taxes if you want to measure revenue accurately.
- Always keep privacy regulations in mind, ensuring you have consent from your users to track their actions, especially under laws like GDPR or CCPA.
By following these steps, you should be able to manually implement the Facebook Pixel Purchase event on your Shopify store, allowing you to track conversion events accurately and optimize your Facebook ad campaigns.
Adding Page View Event To Additional Scripts Section
Shopify’s standard checkout process is somewhat restrictive regarding custom scripts, particularly for stores that are not on Shopify Plus. Shopify Plus stores have more flexibility with checkout customization, including the ability to add custom scripts directly to the checkout pages.
For most Shopify stores, the ability to add custom JavaScript or tracking codes directly to the checkout pages (beyond what Shopify allows through its admin settings) is limited. This is by design, to maintain security and performance standards across all Shopify-hosted checkout processes.
For non-Shopify Plus stores
If you’re not on Shopify Plus, the primary method to ensure the Facebook Pixel tracks customer interactions, including the PageView event, throughout the buying process is to:
- Ensure the Facebook Pixel is installed site-wide by adding it to your theme’s theme.liquid file. This ensures that the Pixel is active across all pages of your store, including the initial stages of the checkout process.
- Use Shopify’s built-in integrations for Facebook to manage tracking on checkout pages as much as possible. Shopify’s integration with Facebook can automatically handle certain tracking functionalities on the checkout page, within the limitations of what Shopify allows for standard accounts.
For Shopify Plus stores
Shopify Plus merchants can add custom JavaScript to the checkout pages by:
- Accessing the Script Editor: Shopify Plus stores have access to a script editor for the checkout process, where you can add custom scripts, including the Facebook Pixel PageView event code.
- Customizing the Checkout.liquid Layout: Shopify Plus allows you to directly edit the checkout.liquid layout file, enabling the addition of custom tracking codes like the Facebook Pixel.
Implementing page view on checkout for Shopify Plus
If you are a Shopify Plus merchant and wish to add the PageView event code to the checkout page, you would typically:
- Navigate to the Shopify Admin, then to Online Store > Themes.
- Edit the checkout.liquid file (available only to Shopify Plus stores) or use the Script
- Editor to add your custom JavaScript for the Facebook Pixel PageView event.
In summary, while adding the Facebook Pixel’s PageView event code directly to the checkout page is beneficial for tracking, the ability to do so on Shopify depends on your store’s plan and Shopify’s limitations for customization on checkout pages.
For most standard Shopify stores, leveraging Shopify’s built-in Facebook integration is the recommended approach to ensure compliance and functionality.
Should you add page view to your Shopify's additional scripts section?
The “Additional scripts” section in Shopify is primarily used for adding scripts that run after an order has been processed, specifically on the order status page (also known as the “Thank You” page). This section is ideal for tracking conversion-related events, such as the Facebook Pixel purchase event, because it’s where you can accurately capture when a sale is completed.
For most standard Shopify stores, leveraging Shopify’s built-in Facebook integration is the recommended approach to ensure compliance and functionality.
For tracking page view events specifically on the checkout page or throughout the checkout process, Shopify’s standard setup doesn’t provide direct access to insert scripts into the checkout flow itself, except for Shopify Plus users who have access to customize the checkout experience more deeply.
However, if you’re aiming to track page views, including those on the checkout page, the best practice is to ensure the Facebook Pixel code is added to your theme’s global template file (theme.liquid).
This way, the Pixel is loaded on every page of your Shopify store, including the checkout process, up until the final order confirmation page where Shopify’s “Additional scripts” section comes into play.
Page view tracking
Now, let’s see how you can have:
- Global site-wide tracking, and
- Order confirmation page tracking
Global Site-Wide Tracking
Install the base Facebook Pixel code in the theme.liquid file to ensure it tracks page views across your entire site, including the initial stages of the checkout process.
Order Confirmation Page Tracking
Use the “Additional scripts” section for tracking specific events that occur after the checkout process, like the Purchase event, by adding event-specific code to this section. This doesn’t directly impact tracking page views but is essential for conversion tracking.
How Shopify And Facebook Know Your Pixel ID On The Checkout Page
Pixel ID is a unique identifier for your Facebook Pixel, and it’s essential for linking the data collected by the Pixel back to your Facebook Ads account. If you’re using the fbq function to track specific events like purchases, you need to ensure that your Pixel base code, which includes your Pixel ID, is installed on your website.
This base code should be set up to load on every page of your site, including the checkout pages and the order confirmation page (“Thank You” page).
- Base Code Installation: The base code initializes the Pixel with your unique Pixel ID, linking the tracking data to your Facebook Ads account.
- Event Tracking: When you track specific events (like a purchase), the fbq function uses the already initialized Pixel on the page (from the base code) to send the event data to Facebook. Since the Pixel is initialized with your Pixel ID, Facebook knows which account to associate the event data with.
By following this setup, you ensure that your Pixel ID is correctly recognized across your Shopify store, enabling accurate tracking of page views and specific events like purchases.
This setup is crucial for the effective use of Facebook Ads, allowing you to measure, optimize, and build audiences for your campaigns.
Shopify Checkout Domain
Shopify’s checkout process operates on a separate, secure domain (e.g., checkout.shopify.com) for stores without a custom domain configured or on a domain specific to the shop for those with custom domains but still under Shopify’s controlled environment.
This setup can introduce concerns regarding cross-domain tracking, as it requires ensuring that cookies and tracking scripts like the Facebook Pixel track the user consistently across both your store’s domain and Shopify’s checkout domain.
How Shopify Handles Cross-Domain Tracking
Shopify has mechanisms in place to handle cross-domain tracking for analytics and conversion tracking purposes, including the Facebook Pixel.
When you use Shopify’s built-in integrations for Facebook or manually install the Facebook Pixel following Shopify’s guidelines, Shopify ensures that the Pixel can track user behavior across the different domains involved in the shopping and checkout process.
Ensuring consistent tracking
It’s time to look at different ways to make sure your tracking is accurate on Shopify. We’ll cover everything from setting up the Pixel manually to advanced options for Shopify Plus users.
Whether you’re just starting out in online sales or have been doing it for a while, knowing these methods is essential for getting the most out of your marketing and growing your business.
Use Shopify's Facebook integration
The simplest way to ensure that your Facebook Pixel tracks users correctly across your store and the Shopify checkout is to use Shopify’s built-in Facebook integration. This integration is designed to handle the complexities of cross-domain tracking automatically.
Manual installation and the fbq('track', 'PageView') event
When you manually install the Facebook Pixel and include the base Pixel code (with your Pixel ID) in your Shopify store’s theme.liquid file, it initializes the Pixel across your entire site.
For the checkout process, as long as the Pixel code is correctly integrated into your store, Shopify’s handling of cookies and sessions should maintain the continuity of tracking from your store’s pages through to the checkout pages, despite the domain change.
This is because the browser sends the Pixel’s cookies along with the request, allowing Facebook to match the page views and events to the same user session.
First-party cookies and browsers' policies
Modern web browsers have been updating their policies to enhance user privacy, including restrictions on third-party cookies.
Shopify and Facebook have adapted to these changes by improving their tracking mechanisms to rely more on first-party data and server-side tracking methods, which are less affected by these restrictions.
Testing your setup
After setting up your Pixel, use tools like the Facebook Pixel Helper Chrome extension to verify that events are being tracked correctly across your store and through the checkout process.
Pay special attention to ensuring that the Pixel fires on the checkout pages and the order confirmation page.
Shopify Plus customizations
If you’re a Shopify Plus merchant, you have more control over the checkout process and can implement custom scripts more freely, which can help ensure seamless cross-domain tracking.
Summing Up
And that’s it! Now you have the know-how to implement your purchase event manually. Some key points of this blog post are:
- PageView Tracking: The base Pixel code tracks PageViews by default once installed in your theme.liquid file.
- Conversion Event Tracking: For tracking specific actions like purchases, add the appropriate event code (e.g., the Purchase event code) in the “Additional scripts” section to capture these events on the order confirmation page.
If you ever need assistance or further guidance, don’t hesitate to reach out to us. We’re here to help you every step of the way.