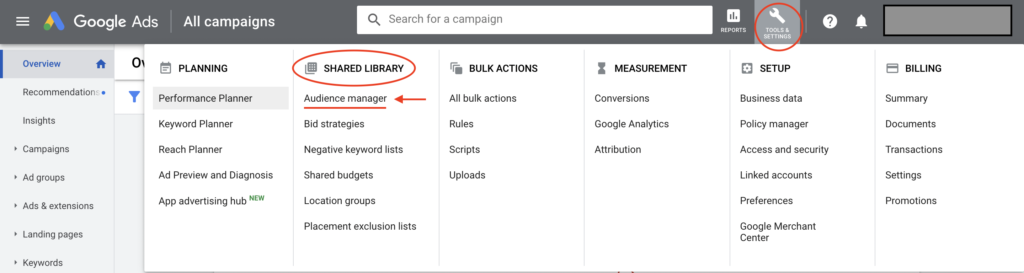
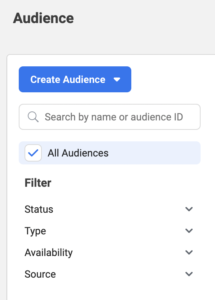
Our app checks if there are any available remarketing lists (based on website visits) in your Google & Facebook accounts. If there are no remarketing lists in the connected accounts from these sources, the test fails.
Benefits of using remarketing lists
- re-engage with your audience
- target more qualified users who are already aware of your business and products
- improve the overall performance of your account
How to create a remarketing list on GOOGLE
Step 1: Sign in to Google Ads.
Step 2: Click the tools icon, then click on Audience Manager under the Shared Library section.
Step 3: To create a remarketing list, click the blue plus button and select Website visitors.
Step 4: On the page that opens, start by entering a remarketing audience name.
Step 5: There are many variations of a remarketing audience you can create. For example, you can select “Visitors of a Page” to create a remarketing list that targets people who have been to one or more specific pages on your website.
Other options include:
To learn more about each of these, click here.
Step 6: For each option, add the conditions for pages on your website where you’d like to collect visitor cookies. Values can be words, numbers, or dates, depending on the rule template and conditions you selected for the list you’re creating.
After you’ve completed a rule, click OR or AND (depending on the rule option you selected).
Step 7: You can add site visitors from the previous 30 days to your list, or you can start with an empty list.
Note: If you have a remarketing tag on your website and want to include visitors who match your list’s rules, select the option to add site visitors from the previous 30 days.
Step 8: Enter a membership duration, which is the length you want a visitor to stay on your list. You can change the membership duration at any time.
Step 9 (Optional): Enter a description of your audience.
Finally, click “Create audience” and you’re all done!
How to create a remarketing list on FACEBOOK
Step 1: Go to Ads Manager.
Step 2: From the page menu on the left click “Business tools”, and then click “Audiences”.
Step 3: Click the Create Audience dropdown and select Custom Audience.
If you don’t have any audiences, you’ll see audience creation buttons, rather than dropdowns.
Step 4: Choose a website as your source.
Step 5:
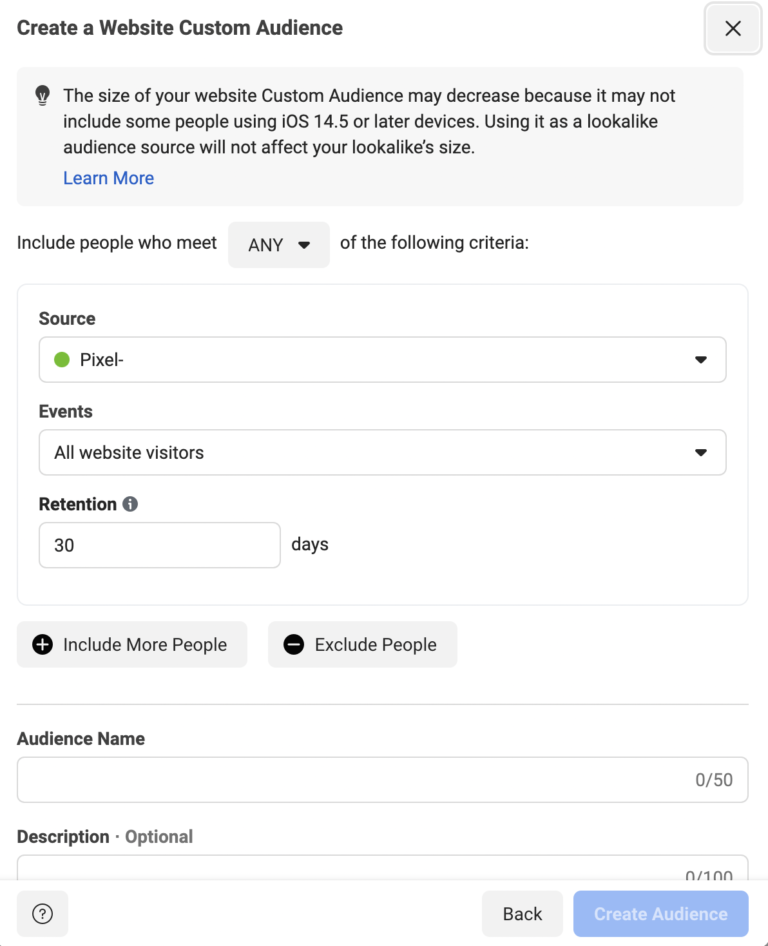
Include people who meet any or all of the selecting criteria.
Source: Choose your Pixel from the dropdown.
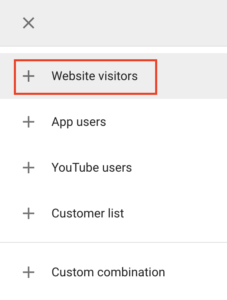
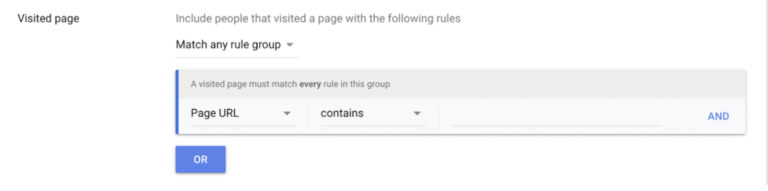
Events: Choose the type of visitors. (All website visitors, people who visited specific pages)
Retention: Enter the number of days you want people to remain in your audience after meeting the website traffic criteria you specified. Max time: 170 days.
Step 6: Give your audience a name (and description, if desired).
Step 7: Click Create Audience.
ℹ️ When you finish creating your audience, select it during ad set creation to reach the people in it with ads.
If you have any questions, feel free to contact us at [email protected]
No comment yet, add your voice below!